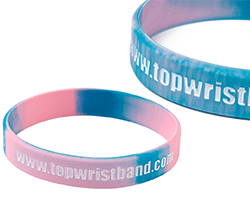
Unleash Your Creativity with These Budget-Friendly DIY Wristbands
If you’re a fan of wristbands and want to add your own personal touch to your look, creating DIY wristbands can be an excellent option. They have become an integral part of our daily attire, serving different purposes and fitting various styles, from athletic bands to beaded bracelets.
However, purchasing wristbands can be costly, making DIY projects an ideal way to save money while showcasing your creativity. In this post, we’ve gathered some fantastic ideas for DIY wristbands to inspire your next project.

Table of Contents
Here are some DIY wristbands ideas:
Fabric Wristband
This is an excellent idea for those who are into sewing. You can use any fabric of your choice to make these wristbands, but cotton fabric works best. You will need to cut a strip of fabric that is long enough to wrap around your wrist and wide enough for a comfortable fit. Sew both ends together, and voila! You have a fabric wristband.
Beaded Wristband
Beaded wristband: Beaded wristbands are popular among DIY enthusiasts because they are easy to make and look great. You can use any beads of your choice, but pony beads are popular because they are affordable and come in many colors. String the beads onto a piece of elastic string, then knot both ends together. Trim the excess string, and your beaded wristband is ready to wear.
Leather Wristband
This wristband is perfect for those who love the rustic look. You can use real or faux leather to make the wristband. Cut the leather into a strip that is long enough to wrap around your wrist, leaving some allowance for overlap and fastening. Punch a hole at both ends of the strip and four additional holes in between. Insert a button or snap fastener into one end and sew it on securely. On the other end, sew on a loop that will fit over the fastener. You can decorate the wristband with studs, grommets, or any other embellishments you like.
Paracord Wristband
Paracord bracelets are a favorite among hikers and campers because they are incredibly durable and versatile. You will need a length of paracord that is long enough to wrap around your wrist twice. Fold it in half and make a loop at the folded end. Thread the other end through the loop and tighten to form a knot. Begin braiding the cord until you have reached the desired length, then tie a knot at the end. Melt the excess cord with a lighter to prevent fraying.
Ribbon Wristband
This is a fantastic idea if you have a stash of ribbons lying around. You can mix and match different ribbons to create a unique wristband. Cut the ribbon into a length that is long enough to wrap around your wrist. Use a fabric glue or a hot glue gun to attach the ribbon to a strip of elastic. Fold the elastic in half and sew both ends together, making sure that the ribbon is sandwiched in between. Your ribbon wristband is ready to wear.
These are just a few DIY wristbands ideas to get you started. There are endless possibilities, and you can let your creativity run wild. Making your wristband is an excellent way to express yourself and show off your style. Moreover, it is a fun activity that you can do with your friends or family.
In conclusion, making your wristband is an affordable and fun way to add some flair to your outfits. We hope these ideas will inspire you to get creative and make your wristbands. Give it a try and see how it turns out! Let us know in the comments which of these ideas are your favorite, and if you have any ideas of your own, share them with us.
Please like, share, and leave your comments below. Click here to make DIY wristbands.https://www.topwristband.com
Reference Website: https://www.nme.com/blogs/festivals-blog/preserve-festival-wristbands-tips-2107548