In today’s world, personalization has become a significant trend, especially when it comes to accessories and everyday essentials. Among these, the personalized lanyard stands out as a versatile, practical, and stylish item that can reflect your personality, promote your brand, or serve as a memorable gift. Whether you’re looking to craft your own DIY personalized lanyard for a special event, team, or personal use, this comprehensive guide will walk you through every step of creating a beautiful, durable, and unique accessory.
Table of Contents
- What Is a Personalized Lanyard?
- Benefits of Making Your Own Personalized Lanyard
- Materials Needed for a DIY Personalized Lanyard
- Design Ideas for Your Custom Lanyard
- Step-by-Step Guide to Making a Personalized Lanyard
- Tips and Tricks for a Professional Finish
- Customization Options and Embellishments
- How to Care for Your DIY Personalized Lanyard
- Creative Uses for Your Handmade Lanyard
- Frequently Asked Questions About DIY Personalized Lanyards
- Conclusion: Why a DIY Personalized Lanyard Is a Must-Try Project
1. What Is a Personalized Lanyard?
A personalized lanyard is a fabric or nylon strap that is customized with specific designs, logos, text, or images to suit individual preferences or branding needs. These accessories are commonly used for holding ID badges, keys, or small tools, making them both functional and fashionable.
Unlike generic lanyards, personalized versions allow the wearer or creator to express their personality, promote a business, or commemorate an event. With the rise of DIY culture, crafting your own personalized lanyard has become a popular project for hobbyists, students, educators, and event organizers.
2. Benefits of Making Your Own Personalized Lanyard
Creating your own DIY personalized lanyard offers several advantages:
- Cost-Effective: Making your own lanyard can be more affordable than purchasing customized ones, especially in bulk.
- Unique Design: You have full control over the design, colors, and embellishments, ensuring your lanyard is one-of-a-kind.
- Personal Satisfaction: Crafting your own accessory provides a sense of achievement and a personal touch that store-bought items can’t match.
- Perfect for Events: Custom lanyards are excellent for conferences, weddings, school events, or team activities.
- Brand Promotion: For businesses, personalized lanyards serve as effective promotional tools when customized with logos or slogans.
- Gift Idea: Handmade personalized lanyards make thoughtful, personalized gifts for friends, family, or colleagues.
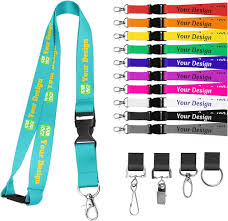
3. Materials Needed for a DIY Personalized Lanyard
Before starting your project, gather the necessary materials:
- Strap Material: Nylon webbing, polyester ribbon, or cotton fabric strip (length: approximately 36-40 inches)
- Printing or Embellishment Method: Fabric paints, iron-on transfers, embroidery thread, or printable iron-on sheets
- Hardware: Swivel hooks, metal clips, or keyring attachments
- Buckles or Adjusters: For adjustable lanyards
- Sewing Supplies: Needle, sewing machine (optional), fabric glue
- Decorative Elements: Beads, charms, rhinestones, or embroidered patches
- Adhesives: Fabric glue, double-sided tape
- Tools: Scissors, ruler, hot glue gun, iron
Choosing quality materials ensures your personalized lanyard will be durable and comfortable to wear.
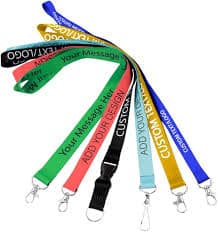
4. Design Ideas for Your Custom Lanyard
The design is the heart of your DIY personalized lanyard. Here are some ideas to inspire your creativity:
- Logos and Texts: Add your name, company logo, or event name.
- Color Themes: Use colors matching your school, company, or favorite palette.
- Patterns and Graphics: Incorporate patterns, cartoon characters, or abstract designs.
- Embellishments: Attach charms, beads, or embroidery for added texture.
- Photo Transfers: Use printable iron-on sheets to add photos or detailed graphics.
- Inspirational Quotes: Include motivational phrases or personalized messages.
- Seasonal Themes: Create holiday-themed lanyards for special occasions.
Remember, your personalized lanyard design should reflect your personality or branding goals.
5. Step-by-Step Guide to Making a Personalized Lanyard
Here’s a detailed process to craft your own DIY personalized lanyard:
Step 1: Measure and Cut the Strap
- Decide on the length of your lanyard (generally 36-40 inches).
- Cut your chosen fabric or webbing material to this length.
- For a comfortable fit, ensure the width is between 0.75 to 1 inch.
Step 2: Design Your Artwork
- Create or select your design using graphic software or by hand.
- If printing images, ensure they are high-resolution.
- Print your design onto iron-on transfer paper or fabric sheets compatible with your printer.
Step 3: Apply Your Design
- For iron-on transfers:
- Follow the manufacturer’s instructions to iron the design onto the fabric.
- For fabric paints:
- Use stencils or freehand painting to decorate your strap.
- For embroidery:
- Use embroidery thread to sew your design onto the fabric.
Step 4: Attach Hardware
- Sew or glue the swivel hook or metal clip to one end of your strap.
- Attach a keyring or badge holder if desired.
- Secure the other end with a loop or a buckle for easy wear and removal.
Step 5: Add Embellishments
- Decorate your lanyard with beads, charms, or rhinestones.
- Sew or glue these embellishments securely to prevent loss.
Step 6: Final Assembly
- Ensure all components are firmly attached.
- Check for any loose threads or glue.
- Trim excess threads or fabric.
Step 7: Testing
- Wear the personalized lanyard to ensure comfort.
- Test the hardware for secure attachment.
6. Tips and Tricks for a Professional Finish
- Use Quality Materials: Invest in durable fabric and hardware for longevity.
- Plan Your Design: Sketch your design beforehand to ensure a balanced and attractive look.
- Pre-wash Fabric: Wash and dry fabrics before decorating to prevent shrinkage later.
- Heat Settings: Use appropriate heat settings when applying iron-on transfers.
- Secure Embellishments: Use strong adhesives or stitches to prevent falling off.
- Symmetry: Keep designs centered and aligned for a professional appearance.
- Experiment: Practice on scrap fabric before working on your final piece.
7. Customization Options and Embellishments
Make your personalized lanyard truly unique by exploring various customization options:
- Text Personalization: Incorporate names, titles, or slogans.
- Color Blocking: Use contrasting colors for a modern look.
- Layered Designs: Combine different fabrics or textures.
- Glow-in-the-Dark Elements: Add fun with glow-in-the-dark paint or beads.
- 3D Embellishments: Use foam or fabric appliqués for a textured effect.
- Theme-Based Decorations: Match your lanyard to holidays, seasons, or personal hobbies.
8. How to Care for Your DIY Personalized Lanyard
Proper maintenance extends the lifespan of your personalized lanyard:
- Hand Wash: Gently wash with mild detergent to preserve printed designs.
- Avoid Harsh Chemicals: Keep away from bleach or strong solvents.
- Air Dry: Lay flat or hang to dry; avoid tumble drying.
- Store Properly: Keep in a cool, dry place to prevent mold or fading.
- Inspect Regularly: Check hardware and embellishments for wear and tear.
9. Creative Uses for Your Handmade Lanyard
Your DIY personalized lanyard can serve various purposes:
- ID Badge Holder: Perfect for workplaces, schools, or conferences.
- Key Organizer: Keep keys accessible and secure.
- Promotional Item: Distribute at events with your logo or slogan.
- Gift or Party Favor: Personalized gifts for friends or colleagues.
- Fashion Statement: Complement your outfit with a custom accessory.
- Hobby or Club Badge: Represent your interests or memberships.
10. Frequently Asked Questions About DIY Personalized Lanyards
Q1: Can I make a personalized lanyard without sewing skills?
Yes, using fabric glue or iron-on transfers can simplify the process. Many projects can be completed without sewing.
Q2: What is the best material for a durable lanyard?
Nylon webbing or polyester ribbons are strong, weather-resistant, and suitable for customization.
Q3: How long does it take to make a DIY personalized lanyard?
Depending on complexity, it can take from 1 to 3 hours.
Q4: Can I customize lanyards for large groups?
Absolutely. Bulk materials and templates can streamline mass production.
Q5: Is it safe to wear a handmade lanyard all day?
Yes, if made with skin-friendly materials and properly assembled, it’s safe and comfortable.
11. Conclusion: Why a DIY Personalized Lanyard Is a Must-Try Project
Creating your own personalized lanyard through a DIY approach is a rewarding experience that combines creativity, practicality, and personalization. Whether you’re designing a custom accessory for an event, promoting your brand, or crafting a unique gift, a handmade lanyard offers unmatched customization and satisfaction.
With the right materials, a bit of patience, and a dash of creativity, you can produce a personalized lanyard that stands out and reflects your personality or brand identity. So why not embark on this fun and functional project today? Your perfect, one-of-a-kind lanyard awaits!
**Start your DIY journey now and craft a personalized lanyard that’s as unique as you are!